Lesson 07 | Take Your First (Paper) Trade
In Lesson 06 we planned a trade from scratch. You marked your levels, read your indicators, checked your risk, and identified a setup worth taking.
Now we're gonna take it.
This lesson walks you through everything, from setting up your paper trading account to closing the trade and logging it in the app. No real money. Real charts, real prices, real results.
By the end of this lesson you will have placed your first trade using 7 specific steps. Huge achievement unlocked! 🥇
Let's go!
Step 1: Set up your paper trading account
At the top of your TradingView chart you'll see a Trading Panel tab. Click it.
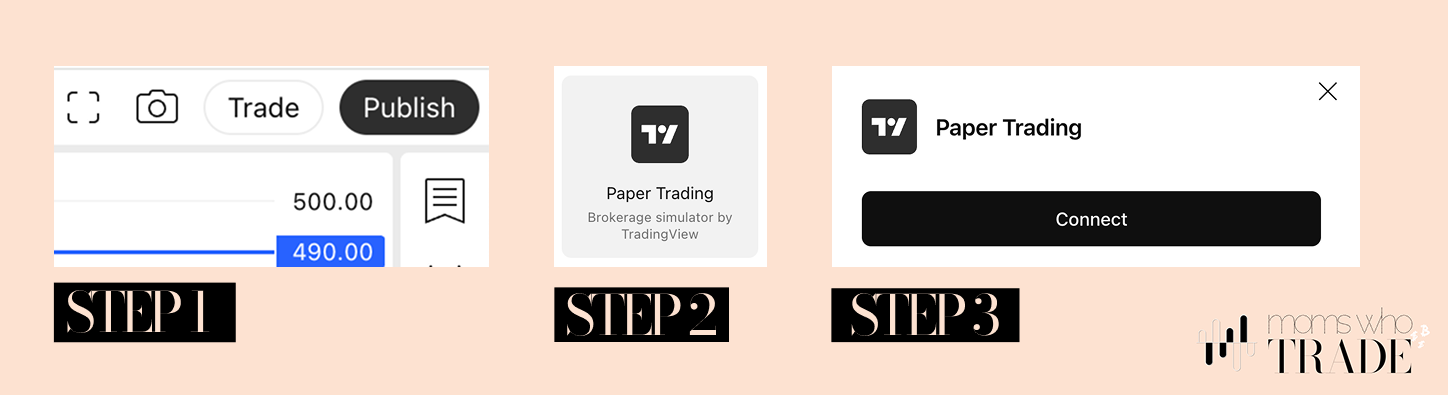
Select Paper Trading from the broker list and click Connect. At the bottom of your TradingView chart you'll see a Trading Panel tab. Click it. Now click the trade button to open the order form.
If you're on your phone, click the three dots menu at the bottom right and enable it.
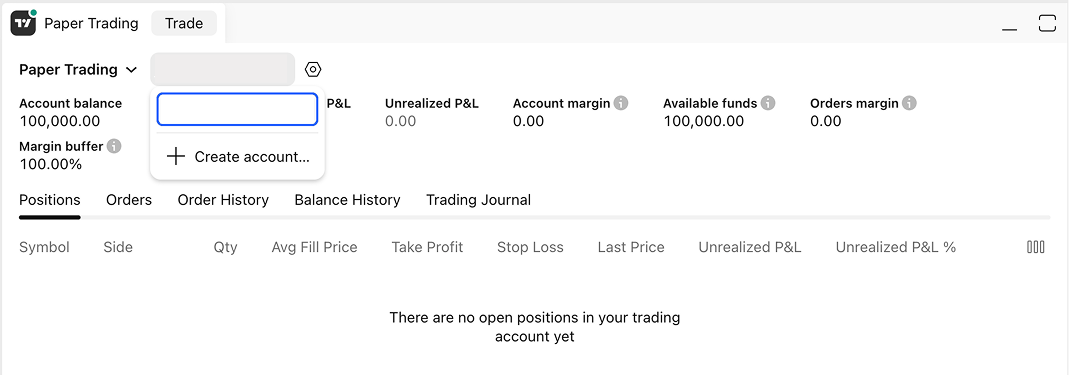
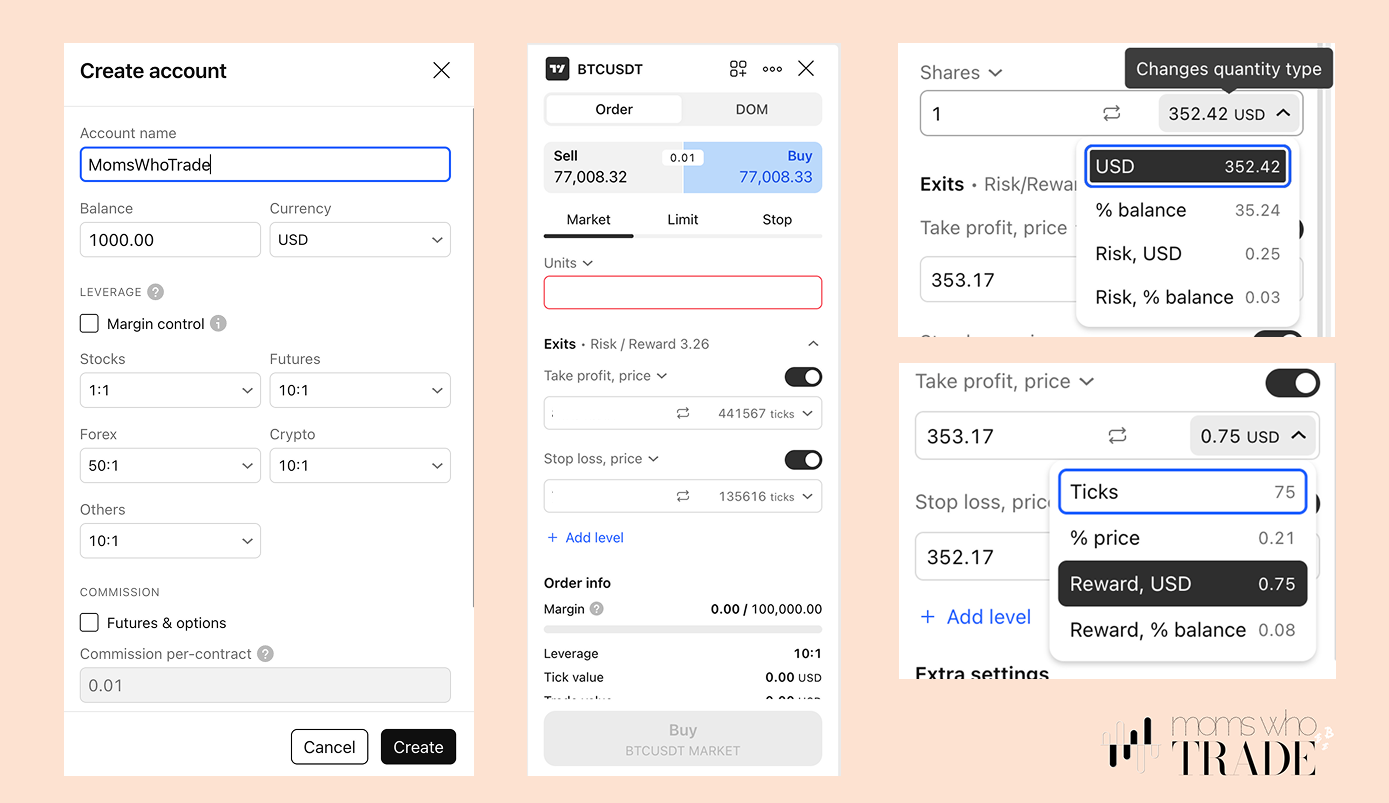
On the left side of the settings panel, create an account and give your account a name, then set your balance to $100 or $1,000, depending on where you see yourself starting when you're ready to go live with real money. Up to you.
Below that, you'll see your leverage numbers for different asset classes — set them as follows:
Stocks - 4:1 | Futures - 10:1 | Forex - 10:1 | Crypto - 10:1 | Others - 10:1
A quick word on leverage: leverage lets you control a larger position than the money you actually have. So if you have $100 and use 5x leverage, you're trading as if you have $500. It multiplies your gains, but it also multiplies your losses. As a beginner, you never need more than 3-5x leverage when trading with real money. Keep it low, keep it safe.
Now click the trade button to open the order form and make these changes:
- Units — open the dropdown and change to Margin USD. Then, on the right of that same bar, change the quantity type to Risk USD.
- Take Profit — change to Price. Then, on the right of that bar, change Ticks to Reward, USD.
- Stop Loss — do the same.
You're now working in dollars. Everything is clear.
📱 On your phone: Tap the three dots at the bottom → Trade with Broker → Paper Trade → create an account. The order panel opens from the same menu.
Step 2: Now it's your turn
Before you touch the buy button, run through your checklist from Lesson 06 one final time. You will see my risk:reward tool drawn to the right of the chart as a starting point.
Below is my read: The R:R of 4.54. is good, our price is back at support and slightly above (2 of the EMAs - both the 55 and 200), we are at the 0.5 Fibonacci for a retest of that level, all looks ready for this uptrend to continue. Let's go!
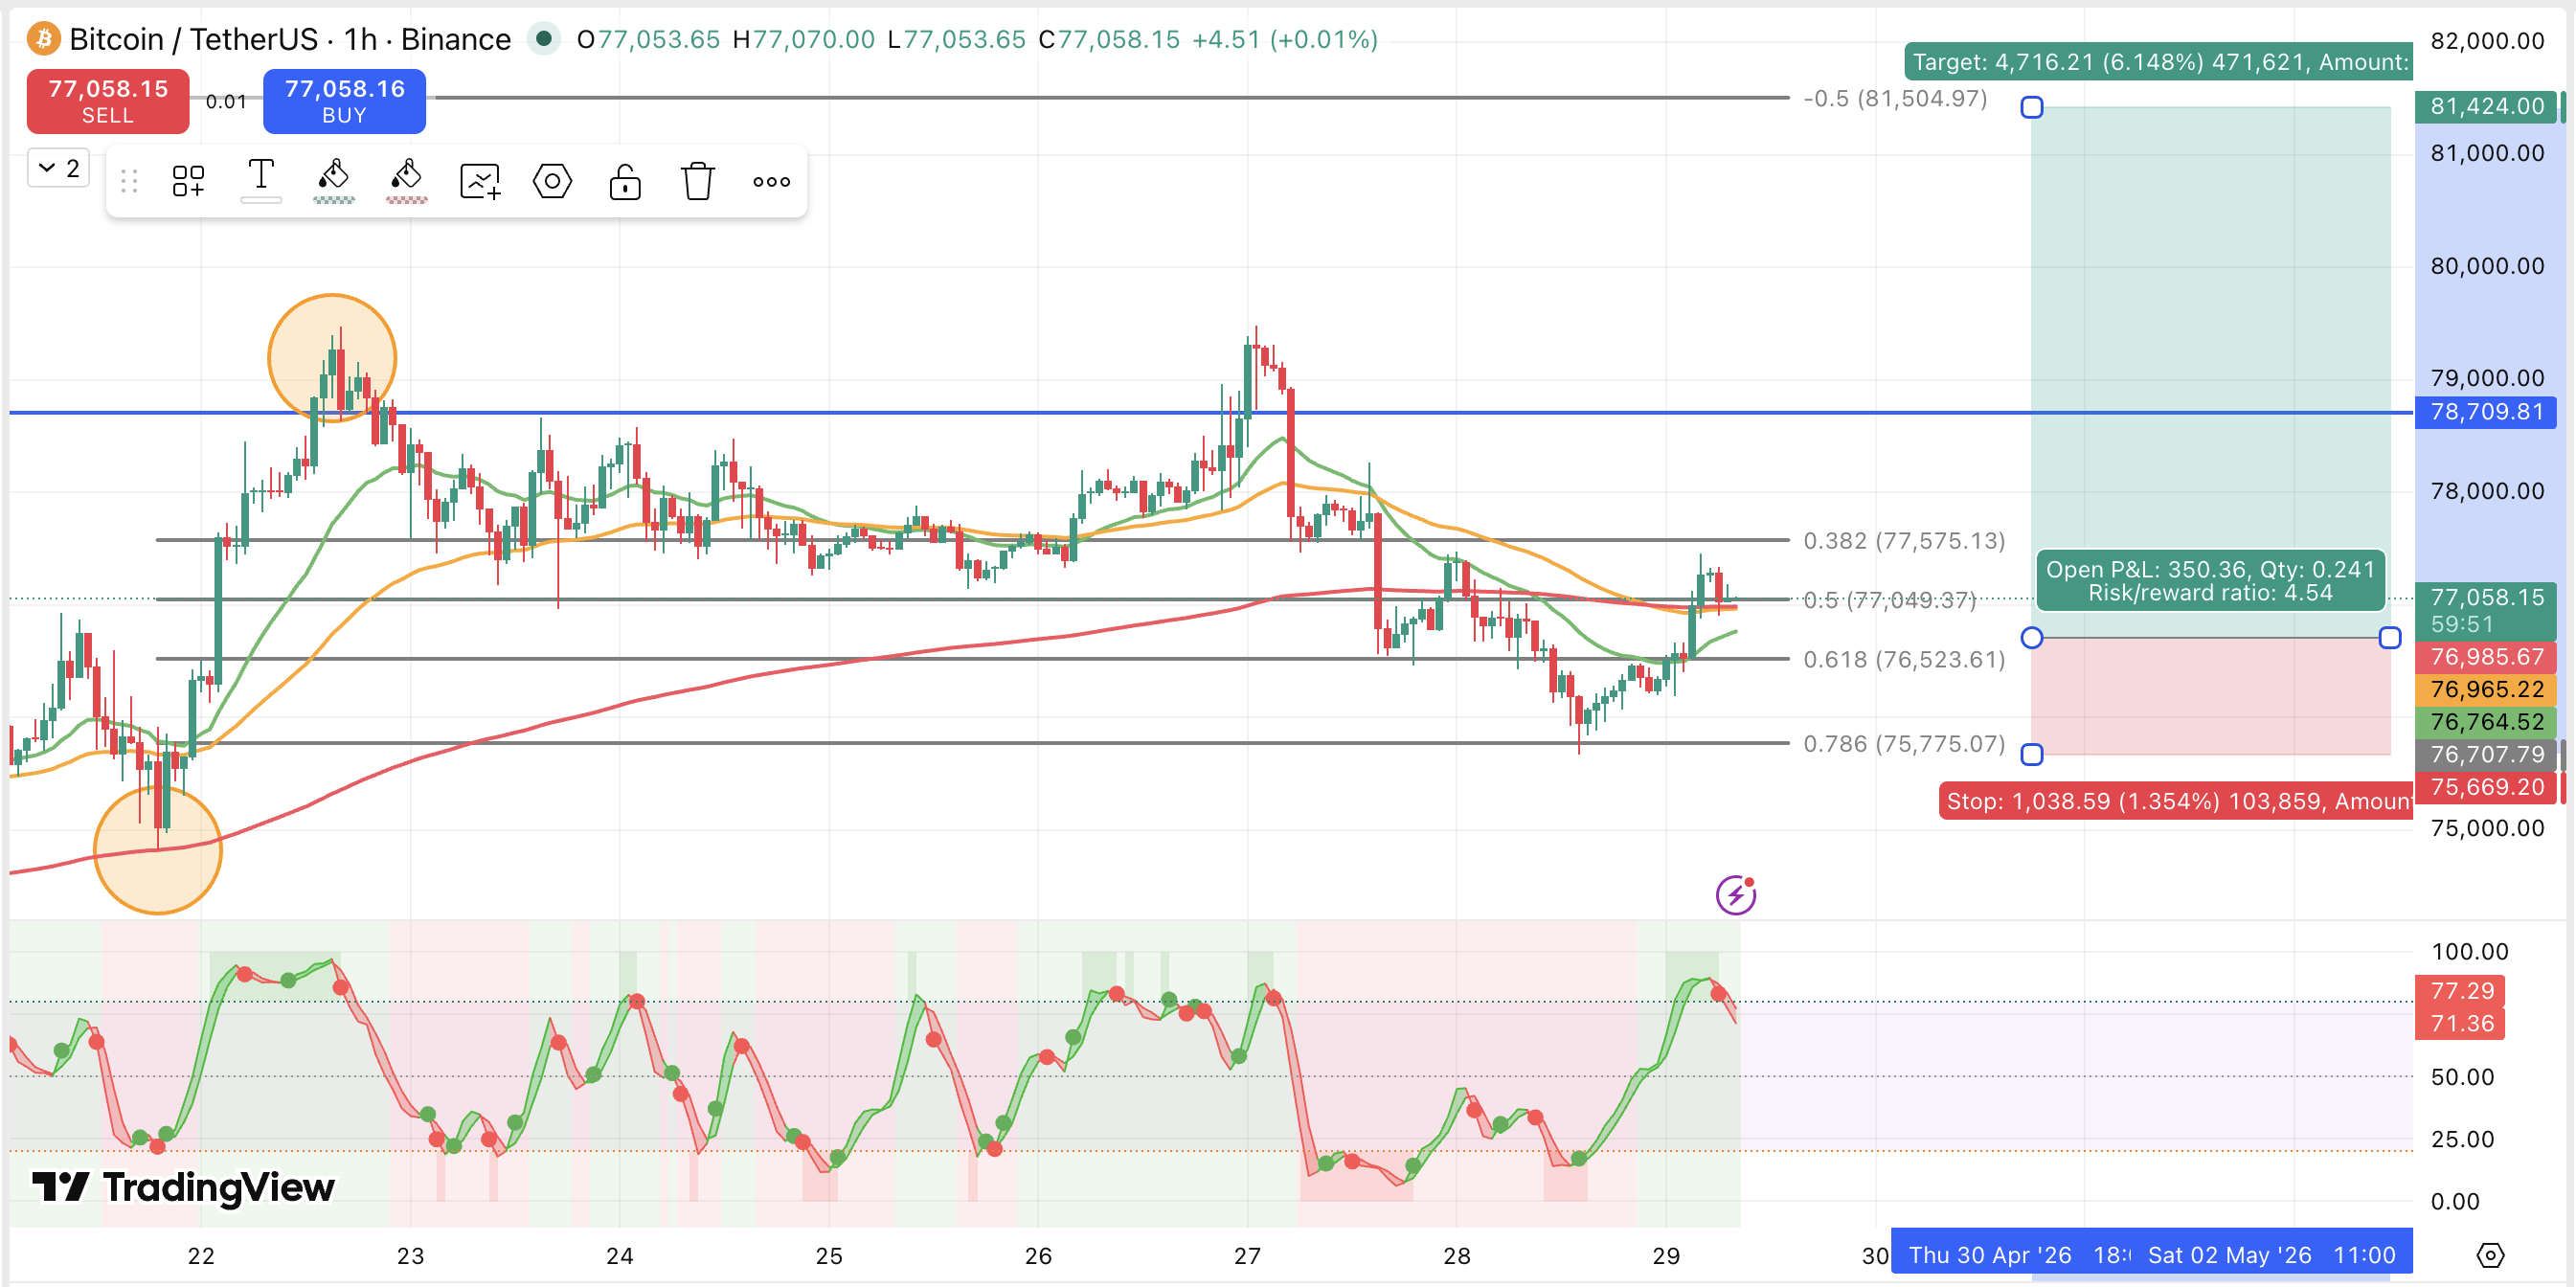
- Support and resistance marked on the Weekly or Monthly
- Trend line drawn on the Daily
- Fibonacci on the Daily and 4H
- EMAs aligned — green above orange, orange above red
- Stochastic coming up from oversold territory
- Risk:Reward at least 3:1
If the majority of these are pointing in the same direction - you have a setup. If they're not aligned - close the laptop and wait. No setup, no trade. That's discipline. That's what separates trading from gambling.
Sometimes the setup isn't quite ready yet - price hasn't reached your entry level. This is where a limit order comes in.
A limit order means you tell the market: "I want to buy, but only when price reaches this specific level." You set your entry price in advance and walk away. If price comes down to your level - the trade opens automatically. If it doesn't reach it, nothing happens and you haven't risked a cent.
This is actually how most of our trades get placed. We identify the level we want, set the limit order, and get on with our day. No sitting and watching screens with anxiety. No chasing price. The market comes to us.
Step 3: Size the trade in the MWT app
Alright. You've read the chart. You have a direction in mind. Before you place your trade, open the MWT app first.
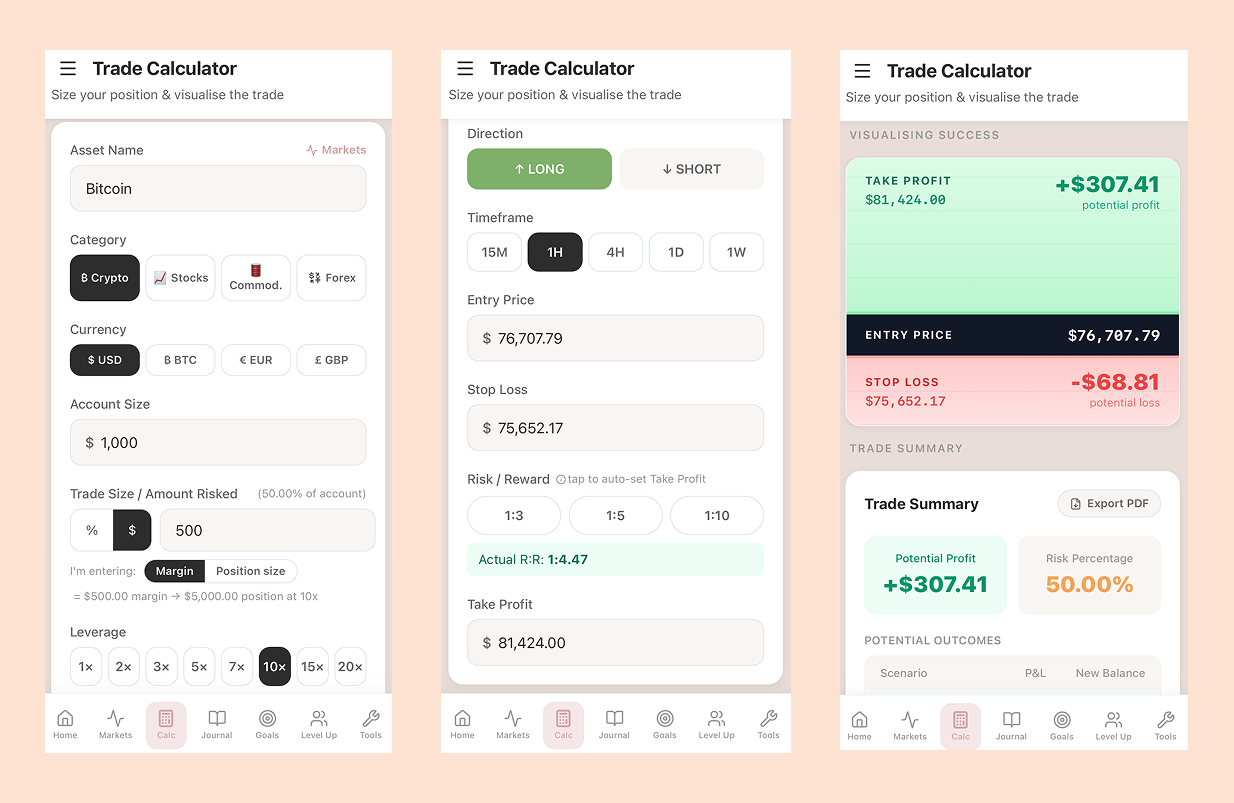
Fill in the calculator - your virtual balance ($1,000), enter your trade size ($200/$500), your Entry Price, your Stop Loss price and your Take Profit. The calculator shows you the amount you will lose or gain. If the numbers look good and you're happy with the setup, hit Take Trade in the app.
That logs the trade automatically in your journal. Done.
Step 4: Place the order in TradingView
Go back to TradingView and enter the same numbers from the app - entry price, stop loss, take profit. Double-check everything matches. Then click Buy.
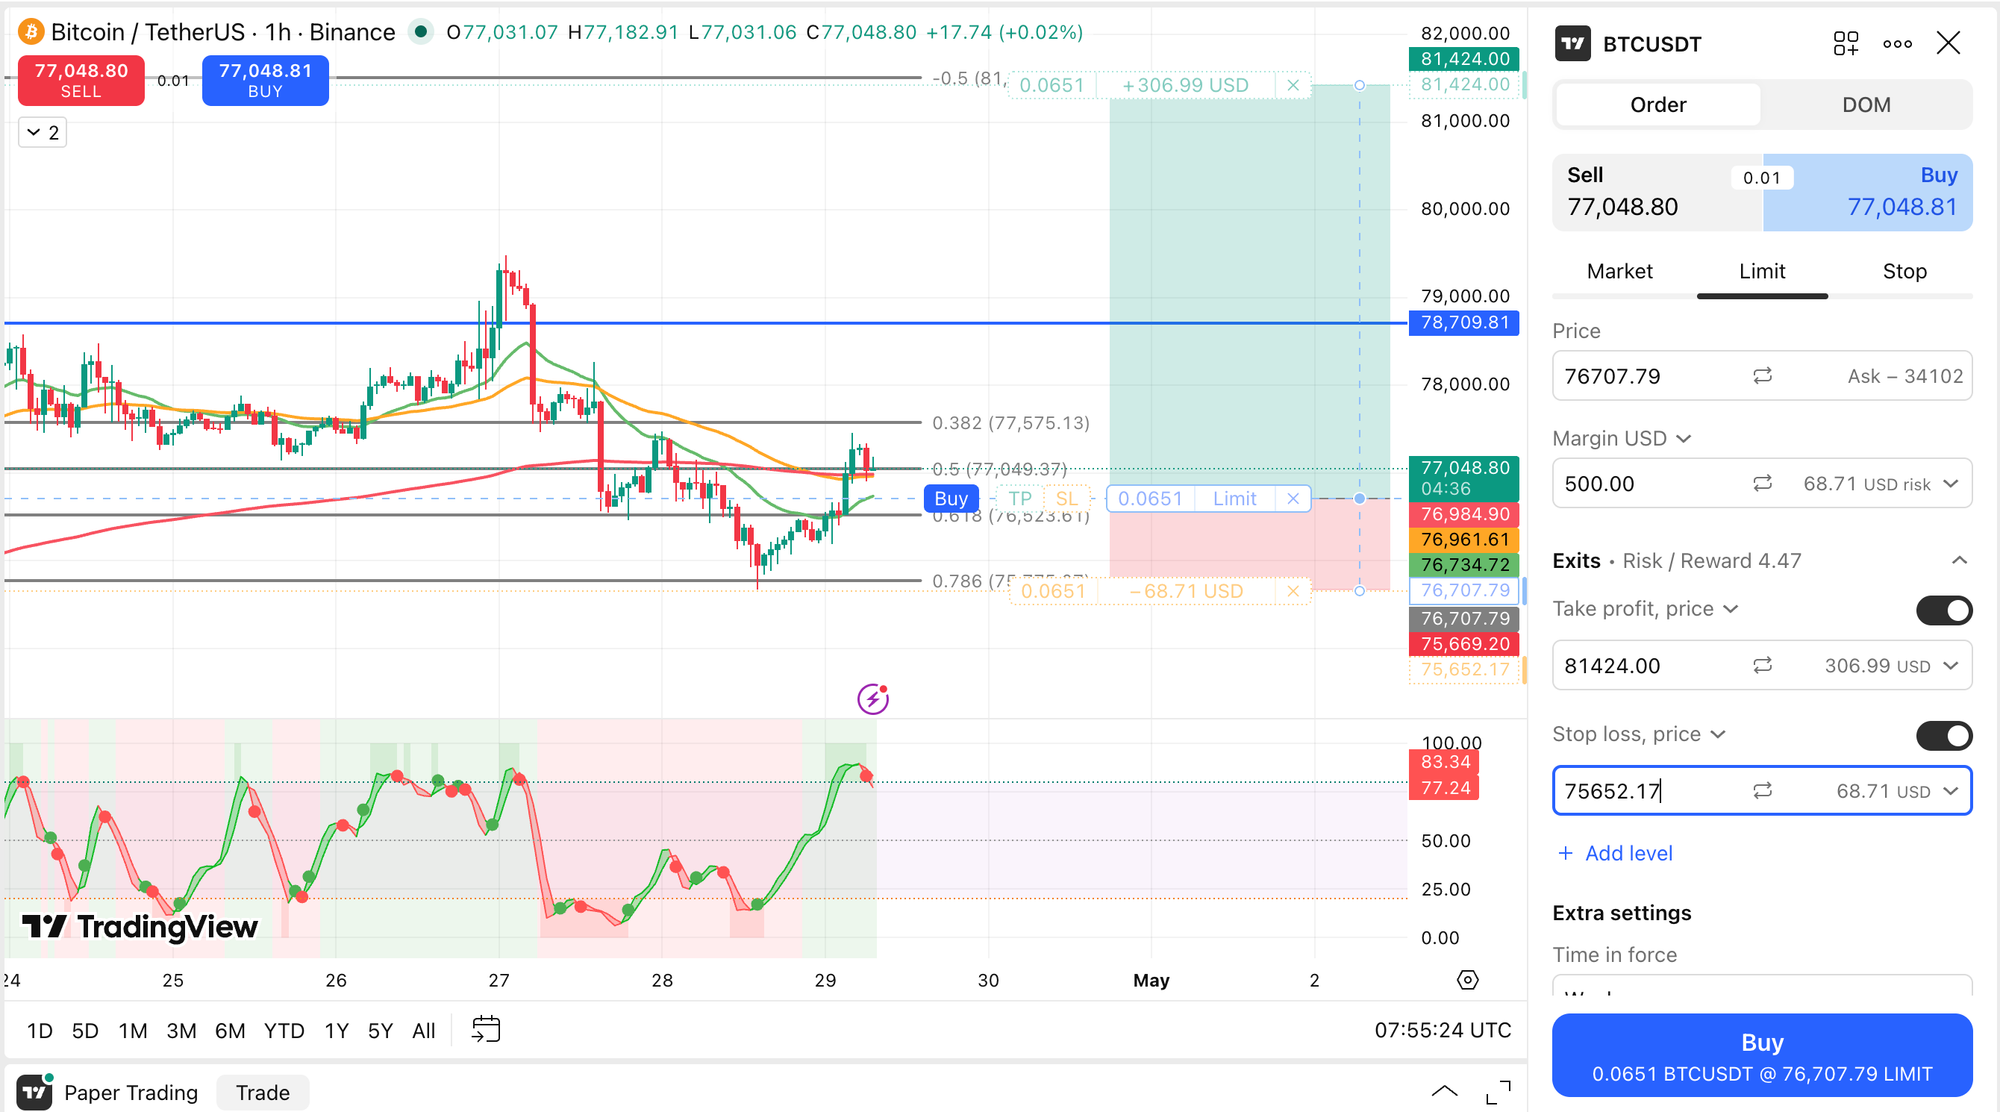
Your first trade is live.
Step 5: Closing the trade
You don't have to wait for price to always hit your take profit. In fact, that's not even the goal.
The goal is to hit your daily target - whatever you've set in the app. 1%, 2%, 5%, whatever you decided. That's all you need to make each day. Once you've made it, you can close the trade and walk away. Job done.
But sometimes the price action looks strong, and your indicators are still pointing up. In that case, you have another option: partial profits. This means closing a percentage of your trade and letting the rest run toward your take profit.
Close 25%, 50%, or 75% of the position - bank that portion - and leave the remainder running. That way, you've locked in real gains and still have skin in the game if the move continues.
Either way, the decision is yours. Hit your goal and close it, take partials and let it run, or wait for your full take profit. All three are valid. What matters is that you're making deliberate decisions - not just watching and hoping.
The goal is not to be right and stroke the ego. Your goal is to compound your account so your trade size keeps growing and gives you bigger returns in time.
Step 6: Closing your trade (even partially)
To close in TradingView, go to your open positions in the Trading Panel at the bottom. Click Close to close the full position, or adjust the quantity to close a partial amount.
Then open the MWT app. Go into your journal, tap on the trade you logged, change the status to Closed, enter your closing price and what you made, then tap Finalise Trade.
This updates your goal tracker automatically. If you hit your daily goal, the app celebrates with you.
📱 On your phone (TradingView): Tap the three dots → open positions → tap Close.
Step 7: Log it in the journal
Your trade is already logged in the app. Before you close it out, add your notes. Keep it simple and honest:
- Mental state - Focused at your desk or half-distracted with kids? Happy, stressed, anxious? It affects your decisions more than you think.
- Why you entered - Signals lined up? Something in the news? A gut feeling? Write it down.
- Time of trade - AM or PM. You'll start noticing patterns over time.
- Market conditions - Was it trending, consolidating, or volatile?
- Rate yourself - Did you follow your signals or wing it? Did you overtrade or revenge trade? Be honest about what you got wrong and what you got right. Small wins count. Write them down too.
The market does what it does. The journal is how you get better at showing up to it.
Want to see it done? In this video I place a trade with you. No real money, real charts. I take you through opening a paper trading account on TradingView, setting it up in dollars so everything's clear, and walking an entry from start to finish: the levels I'm watching, the risk, the reward.
If the idea of clicking "buy" makes your stomach drop, this is for you. Paper trading means you build the muscle memory with zero risk. Follow along, place your first practice trade today, and log it in the free MWT app the way I show you.
Mom Tip: The goal of paper trading is not to make as much fake money as possible. It's to build a repeatable process - read, decide, size, enter, log - until it feels automatic. When it feels automatic, real money becomes a lot less scary.
Take your time here. There's no rush to move on. Place a few paper trades over the next week. Watch what happens. Log every single one!
You've got this. 💚 Mel
← Lesson 06: Plan Your First Trade You've finished the beginner series. Now pick your method: Pin Money → and download the free app. Start Here